

Views: 0 Author: Site Editor Publish Time: 2026-10-31 Origin: Site


Leaning over an engine bay and staring at a melted wiring harness is a frustrating reality for field technicians and engineers alike. The vehicle is immobilized, and the clock is ticking. You know exactly which part failed. Finding the exact match among thousands of visually identical components, however, feels like searching for a needle in a haystack.
Installing the wrong plug is not just a minor inconvenience; it presents a serious hazard. Forcing an incompatible part into a circuit often leads to electrical shorts, erratic sensor dropouts, or even catastrophic vehicle fires. To navigate this complex landscape safely, executing an accurate cross-reference is the ultimate method for finding exact original equipment manufacturer equivalents or high-quality aftermarket upgrades.
This comprehensive guide provides a structured, step-by-step framework to identify, decode, and select the perfect replacement components without ever risking electrical compatibility issues.
Accurate cross-referencing prevents severe electrical failures and guarantees seamless integration with the existing wiring architecture of the vehicle.
A complete assembly is highly modular. You must independently match the plastic shells, metal contacts, and weather seals.
Visual identification parameters—such as pin count, pitch spacing, and physical keying—are just as vital as reading the stamped alphanumeric codes.
Core engineering specifications, including Ingress Protection ratings and operating temperatures, must be verified before purchasing any replacement parts.
Original components can often be safely swapped with premium aftermarket equivalents, provided the cross-referencing process strictly adheres to technical datasheets.
The automotive industry is rapidly transitioning toward electric vehicles and advanced driver-assistance systems. This technological leap has completely transformed modern vehicle wiring architectures. Miniaturization and high-voltage requirements push manufacturers to design highly specialized, low-tolerance interfaces.
Consequently, the margin for error in cross-referencing has practically vanished. A generic substitute that worked flawlessly on a standard low-voltage system a decade ago could easily cause catastrophic thermal events in modern high-voltage architectures. Furthermore, high-speed data networks require absolute signal integrity. Staying updated on these evolving material tolerances and high-current demands is no longer optional for technicians; it is a baseline requirement for safety and vehicle reliability.
In modern vehicle architectures, intricate electrical networks transmit both high-current power and highly sensitive low-voltage data signals. Selecting the correct component at the bottom of the purchasing funnel requires absolute precision, as even a microscopic deviation in specification can trigger systemic failures.
Attempting to mate incompatible automotive connectors is a notoriously common error in vehicle repair and harness manufacturing. Two plugs might appear identical to the naked eye, yet subtle differences in the locking mechanisms or terminal alignments hide beneath the surface. Forcing an incorrect plug into a receptacle bends the internal pins and permanently compromises the silicone weather seals. Once a seal is deformed, moisture and engine fluids inevitably breach the cavity, sparking galvanic corrosion and rapid degradation of the electrical contact.
When a cross-reference is executed poorly, the resulting mismatch frequently manifests as severe electrical instability. Imagine a scenario where a plug rated for a mere 10 amps is installed in a demanding 25-amp circuit. The resulting electrical resistance generates tremendous heat. This thermal event can quickly melt the surrounding plastic, leading to localized short circuits. In addition, a loose mechanical fitment causes micro-fretting. This destructive condition occurs when engine vibration slowly wears away the protective tin or gold plating on the terminals, resulting in voltage drops and intermittent sensor signals that trigger maddening error codes.
Automotive manufacturers mandate incredibly strict repair protocols for a reason. Splicing wires with generic hardware or relying on unverified, off-brand components can instantly void the electrical warranty of a vehicle. Proper cross-referencing serves as your safeguard, ensuring that any repair or harness modification meets strict engineering standards. By identifying the exact family series and material specifications, technicians can perform safe, compliant repairs that uphold structural integrity.
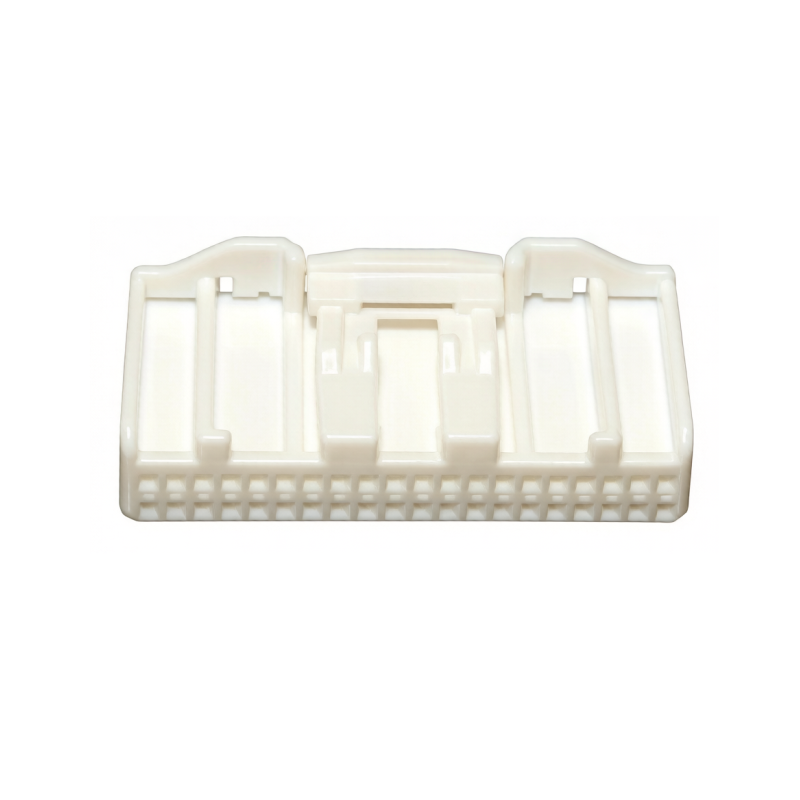
To successfully hunt down a replacement part, you first need to recognize that an automotive plug is rarely a single, monolithic unit. Rather, it is a complex assembly of modular pieces, each demanding its own verification process.
The housing serves as the rigid plastic skeleton that dictates the physical shape of the connection. Typically injection-molded from robust, heat-resistant materials like Polyamide 66 or Polybutylene Terephthalate, the connector housings feature integrated locking latches, mounting clips, and specific male or female orientations. It acts as the primary insulator and the first line of physical defense for the internal circuitry.
The actual transfer of electricity is handled by the metal contacts seated deep inside the housing. It is a fundamental industry standard to note that these terminals almost always carry separate part numbers from the housings themselves. They must be meticulously matched based on their plating material, such as tin, silver, or gold, and the specific wire gauge thickness they are engineered to accept.
Modern safety standards require secondary locking mechanisms to combat extreme vibration. Terminal Position Assurance is a small plastic insert that guarantees the terminals are fully seated within the housing cavities, preventing them from vibrating loose over time. Conversely, Connector Position Assurance is a secondary lock on the exterior of the housing that ensures the two mating halves cannot accidentally separate. During a cross-reference, these tiny components must be accounted for; missing a secondary lock is a guaranteed recipe for premature failure.
For applications located under the hood or along the exposed chassis, environmental protection is non-negotiable. Individual silicone wire seals are crimped directly onto the wire alongside the terminal to block moisture ingress. If a multi-pin housing has empty cavities, dedicated dummy cavity plugs must be inserted into the vacant slots to maintain the waterproof integrity of the entire assembly.
Before you even open a catalog or type a query into a database, you must extract the correct physical and numerical data from the damaged component sitting on your workbench.
Begin by examining the exterior of the plastic housing under bright, direct lighting. Most manufacturers stamp a multi-digit alphanumeric code directly into the polymer. However, you must be careful to differentiate between the actual engineering part number and generic manufacturing mold codes, such as a cavity number or a circular date wheel stamp. Look for the longest string of characters, typically located near the primary locking latch or stamped faintly on the rear face of the housing.
Next, count the total number of terminal positions within the housing. In professional industry terminology, this is referred to as the number of ways or poles. It is absolutely vital to count all available cavities, even if some of them are currently empty or blocked by rubber cavity plugs. The physical footprint of the housing is dictated by the total cavity count, not just the active wires.
Pitch is defined as the exact distance between the center of one pin to the center of the adjacent pin. Grab a set of digital calipers and measure this distance in millimeters. Common sizes include 1.5 millimeters, 2.54 millimeters, and 6.3 millimeters. When a stamped part number is melted or illegible, measuring the pitch becomes one of the most reliable methods to narrow down the product family and secure the correct replacement.
To prevent costly assembly line errors, manufacturers utilize mechanical keying. These are specific plastic ribs, slots, and grooves molded directly into the housing shell. Two plugs may boast the exact same pin count and pitch, but differing keyways will physically prevent them from mating. Keying is frequently color-coded. Always document the color and the exact location of these alignment ribs.
Once the physical data is gathered, the actual cross-referencing process begins. This phase requires navigating technical documentation to ensure zero compatibility risks.
Specifically, when dealing with high-density module interfaces, precision is non-negotiable. Take, for instance, a 2.2 millimeter pitch 40-pin wire end male housing used in control modules. If you attempt to cross-reference this with a standard 2.54 millimeter pitch alternative, the pins will misalign, crushing the delicate contacts upon insertion. Sourcing exact equivalents—like a 1318389-1 compatible 40-position shell—ensures the mechanical keying and terminal alignment remain factory-correct.
Take the identified part number and input it into digital manufacturer catalogs or distributor databases. Your primary goal here is to locate the official technical datasheet. This document serves as the ultimate source of truth; it will confirm the family series, outline the exact mating parts, and list the compatible terminals and required seals necessary for a complete rebuild.
Understanding part number nomenclature can save you from costly purchasing errors. Often, a base part number dictates the physical shape of the shell, while a suffix dictates the color or the specific keying pattern. Furthermore, a change in a single digit might indicate a different packaging type rather than a different fitment. Always consult the manufacturer part number breakdown chart to understand precisely what each digit represents.
To eliminate guesswork, use the following baseline criteria when comparing original specifications against potential aftermarket replacements.
Specification Parameter | Original Standard Requirement | Acceptable Aftermarket Equivalent |
|---|---|---|
Pitch Spacing | Exact match required | Must be dimensionally identical |
Housing Material | Specific polymer blend | Equal or higher thermal resistance grade |
Current Rating | Specified per circuit load | Equal or slightly higher ampacity |
Locking Mechanism | Primary latch plus secondary locks | Must include secondary locking support |
Matching the physical shape is merely half the battle. To guarantee long-term reliability and prevent catastrophic electrical failures, the internal specifications of the replacement parts must perfectly align with the original standards. Before finalizing your purchase of replacement connectors, rigorously verify the following core engineering specifications.
One of the most critical factors in selecting metal contacts is ensuring they match the specific wire gauge utilized in your harness. Automotive wiring is typically measured in American Wire Gauge or metric cross-sectional area.
If you attempt to crimp a terminal designed for a thick wire onto a thinner wire, the mechanical grip will simply be insufficient. This inevitably leads to a loose connection, increased electrical resistance, and eventual wire pull-out due to road vibration. Conversely, forcing a thick wire into a terminal designed for a smaller gauge will result in damaged wire strands and poor conductivity. Always check the datasheet to confirm the acceptable wire size range.
Every electrical circuit in a vehicle carries a highly specific load. A plug supplying power to a high-draw component like a radiator cooling fan might require a robust 40-amp rating, whereas a mass airflow sensor may only carry a delicate 5-amp signal.
When cross-referencing, pay close attention to the continuous current rating versus the peak current rating. Implementing a component with a lower current capacity than required will cause the metal contacts to act as a resistor, generating excessive heat. Over time, this thermal stress will melt the plastic housings, destroy the weather seals, and potentially ignite a vehicle fire.
Automotive environments are incredibly harsh, constantly exposing wiring systems to water, dust, oil, and extreme mechanical shock. The Ingress Protection rating dictates exactly how well the assembly prevents foreign elements from reaching the internal conductive pins.
For interior cabin connections, an unsealed rating is usually sufficient. However, for under-hood or exposed chassis applications, you must select fully sealed systems. A high rating ensures the component can survive temporary submersion in water, while maximum ratings guarantee protection against the high-pressure, high-temperature steam cleaning commonly utilized in engine bays.
The physical location of the wiring harness dictates the thermal endurance required from the plastic shells. Standard injection-molded plastics typically withstand temperatures up to 85 degrees Celsius.
In contrast, components mounted directly to the engine block or near the glowing exhaust manifold demand high-temperature specialized plastics capable of enduring up to 150 degrees Celsius. If you accidentally purchase a standard-temperature housing for a high-heat application, the plastic will rapidly bake, become brittle, crack, and fail under normal engine vibration.
Understanding the specific category of the assembly you are working with will significantly streamline your search when navigating vast, intimidating manufacturer catalogs. Vehicle wiring systems utilize distinct architectures depending on their specific function and location.
Modern vehicles are essentially rolling computer networks, heavily reliant on dozens of Electronic Control Units. When a wiring harness needs to interface directly with the printed circuit board inside a module, engineers utilize specific systems designed for high-density signal transmission.
These components feature a receptacle housing on the wire side and a permanent header soldered directly onto the circuit board. Because these connections handle sensitive data networks, ensuring absolute precision in pin pitch and locking mechanisms is vital. Repairing a module interface with verified components guarantees stable data transmission and prevents intermittent sensor dropouts.
In many repair or modification scenarios, you are not connecting a wire to a computer module, but rather joining two separate wiring harnesses together inline. This is incredibly common when extending a harness, installing aftermarket accessories, or replacing a damaged section of wire hidden in a door jamb.
These systems require a male plug housing and a female receptacle housing that mate securely together, completely suspended within the wiring loom. Because they are often exposed to the elements or tucked into tight chassis cavities, they rely heavily on robust locking tabs and silicone weather seals.
Even armed with a perfect part number, the procurement and installation phases present several hidden pitfalls. Avoiding these common industry mistakes will save you time, money, and severe electrical headaches.
The single most frequent mistake made by buyers is assuming that a plastic housing arrives fully assembled with the metal contacts already inside. In the professional automotive supply chain, housings, terminals, wire seals, and cavity plugs are almost exclusively sold as separate, individual components.
When you locate the correct part number for the plastic shell, you must immediately look up the corresponding part numbers for the crimp terminals designed to fit inside that specific family series. Failing to order the internal hardware means your new housing is entirely useless upon arrival.
The terminology surrounding component gender is notoriously counterintuitive and leads to frequent ordering errors. In automotive wiring, the gender of the plastic housing is determined by the locking mechanism and the outer shell, while the gender of the terminal is determined solely by the metal contact itself.
It is an established industry standard that a male plug housing often contains female socket terminals. Conversely, the female receptacle housing typically holds the male pin terminals. Always double-check the datasheet to ensure you are ordering the correct metal terminal gender for the specific plastic housing you hold in your hand.
A flawless cross-reference is instantly negated if the terminal is installed incorrectly. Automotive open-barrel terminals require a highly specific crimp profile to fold the metal wings perfectly into the copper wire strands.
Using standard hardware store pliers or generic insulated wire crimpers will crush the delicate metal wings, destroying their intended shape. This results in a cold weld with high electrical resistance, which causes voltage drops and excessive heat. Always use a dedicated ratcheting crimp tool designed specifically for uninsulated terminals to ensure a factory-grade, gas-tight connection.
Executing a successful cross-reference demands careful attention to detail that goes far beyond simply matching a part number. You must rigorously verify pin counts, pitch dimensions, mechanical keying, and strict electrical specifications to ensure a safe repair.
By understanding the modular anatomy of these components—matching the housings, terminals, and weather seals perfectly—you eliminate the guesswork that leads to dangerous electrical shorts and voided warranties. Follow the structured steps outlined in this guide to bypass compatibility issues entirely. With the right data and a methodical approach, you can track down your exact match and upgrade your wiring architecture with complete confidence.
If you are struggling to find the exact match for your damaged harness, stop guessing and start sourcing smartly. Visit https://www.jinkeji.com to explore a comprehensive catalog of precision-engineered components. Whether you need high-density module headers or robust inline wire housings, you will find the exact specifications required to complete your repair safely and professionally.
If the stamped part number is destroyed by heat, friction, or age, you can still identify the component through careful physical measurement. Start by measuring the pitch using digital calipers. Next, count the total number of cavities, noting any distinct keying features like offset plastic ribs or specific locking tab locations. Finally, compare this visual and dimensional profile against standard family catalogs provided by major manufacturers. Identifying whether it is a sealed or unsealed system will also rapidly narrow down your options.
Manufacturers often mold tiny, stylized logos directly into the plastic shell. Look closely for small geometric shapes or abbreviated letters near the locking latch. If no logo is visible, the unique shape of the secondary lock or the specific terminal blade width can often point to a specific brand family. Cross-referencing the pitch and pin layout in a digital distributor database will usually reveal the original manufacturer.
Generally, no. While a complete aftermarket assembly can perfectly replace an original assembly, the internal components are highly proprietary. The metal contacts and silicone wire seals are engineered to lock into the specific internal retention cavities of their corresponding plastic shells. Mixing a terminal from one brand with a housing from another will likely result in the terminal failing to lock into place, pushing out the back of the shell when you attempt to plug it in. Always use matched sets within the same product series.
No, terminal pins are not universal. Even if two pins share the same blade width, the location of the locking tang—the small metal tab that clicks into the plastic housing—varies wildly between manufacturers. Inserting a pin with the wrong tang location means it will not secure properly inside the cavity, leading to immediate wire pull-out. You must strictly use the terminal series specified in the housing datasheet.
Often, yes. In professional automotive wiring architecture, color is rarely used just for aesthetics; it usually indicates a specific mechanical keying. Manufacturers use different plastic ribs and slots to prevent assembly line workers from plugging the wrong harnesses together. For example, a black shell will usually have a different keying pattern and will not physically mate with a gray shell of the exact same series, even if the pin count and pitch are identical. Always try to match the color of the original housing to ensure the physical keyways align.
Yes, provided you purchase from reputable manufacturers who build strictly to engineering specifications. High-quality aftermarket parts are molded from the same durable polymers and undergo the same rigorous validation testing for temperature resistance, vibration tolerance, and waterproofing. As long as you perform a proper cross-reference and ensure the electrical ratings match your requirements, premium aftermarket parts offer factory-level reliability without inflated costs.


